By Matthew Jones • Oct 22, 2018
Taxonomies are an incredibly important part of content management: providing the foundation for an efficient content management system to be built around. You might well have heard about AI discussed in relation to content management before but at the end of this blog, we’ll provide you with a fast and free guide to creating a new taxonomy structure, completely from scratch – using Artificial Intelligence (AI).
‘Looking’ at Image Recognition in a New Light
You may wonder initially, where such a concept comes from; as it is one that turns the normal use of auto-tagging ‘on its head’. Instead of adding additional tags to a pre-existing taxonomy, it is possible to create one from ‘the ground up’. Firstly, we will cover why an individual or organisation may want to do this, and then we’ll explain how it exactly works.
From over two decades of content management experience, an area that has become clear to us here at Picturepark is that taxonomies can be menacing to those new to content management. Due to this, new users often have a tendency to ‘over-plan’ and include excessive amounts of structure in their taxonomies. This usually results in them creating one that is too structured around their own perspective or job role. Alternatively, they try hard to create one from an imagined perspective – one that they think will suit the whole of their organisation.
As a result, many never build a taxonomy to the level where it is properly functional: neither for the present nor the future. They frequently only add a few tags, biased to their own needs; which means that over time their new taxonomy has a highly likelihood of becoming disorderly and full of duplicates, or others can’t use it and get onboarded.
Create First – Then Extend
Creating a taxonomy using auto-tagging tools means that users can immediately create a vocabulary based on content what currently exists in their content libraries: not what they imagine them to contain or what they predict may need to be included in the future. This creates something very valuable: a taxonomy based only on ‘hard data’ captured in the present moment.
Of course, using this method – users can then go on to adapt and grow their taxonomy as it expands naturally over time; either by using auto-tagging or by adding structure themselves. The key concept is to create a basic taxonomy, one that can be built on and developed.
Getting Ready
With the power of auto-tagging; it is possible to quickly and effectively create a basic taxonomy. For this to work, all one needs is the following:
- A pre-existing content sample base of images to use.
- A willing DAM vendor, developer or access to an online auto-tagging service.
- A test group to help you refine the AI-built taxonomy vocabulary.
Choosing your sample size is an important area to think about prior to starting to create your taxonomy. You must first decide upon which images to use and the quantity you would like to use. It goes without saying that, like in any research, a large sample size means that you have a wider base to experiment on. In theory, this means that anomalies have a reduced impact upon results and reduces what statisticians refer to as the ‘margin of error’.
However, you must also balance this with aspects such as the amount of time you are willing to invest and the amount of appropriate images you have. It is better to go for a smaller sample size, than it is to unnecessarily bulk it out with images that will distort your taxonomy’s vocabulary. As a minimum, you should have at least a few hundred images to use.
Choosing a Method for Taxonomy Creation
In the interests of versatility, we will cover three different methods for creating a taxonomy using auto-tagging tools:
Method One: Using a DAM provider with integrated AI.
Method Two: Going direct to an AI provider with a demo version of a web based image recognition service.
Method Three: Creating a small API client. This method will require a small amount of time in development; either by yourself or if coding if not your forte, there is always the option to hire a developer for a few hours work.
Method One: Using a DAM system with AI
Most DAM systems have integrated artificial intelligence functionality. For instance, Picturepark has an inbuilt Clarifai connector that will allow for content to be auto-tagged. You can simply request a free trial from us and get set-up quickly, so that you can begin the process. To do so, simply fill in your details here.
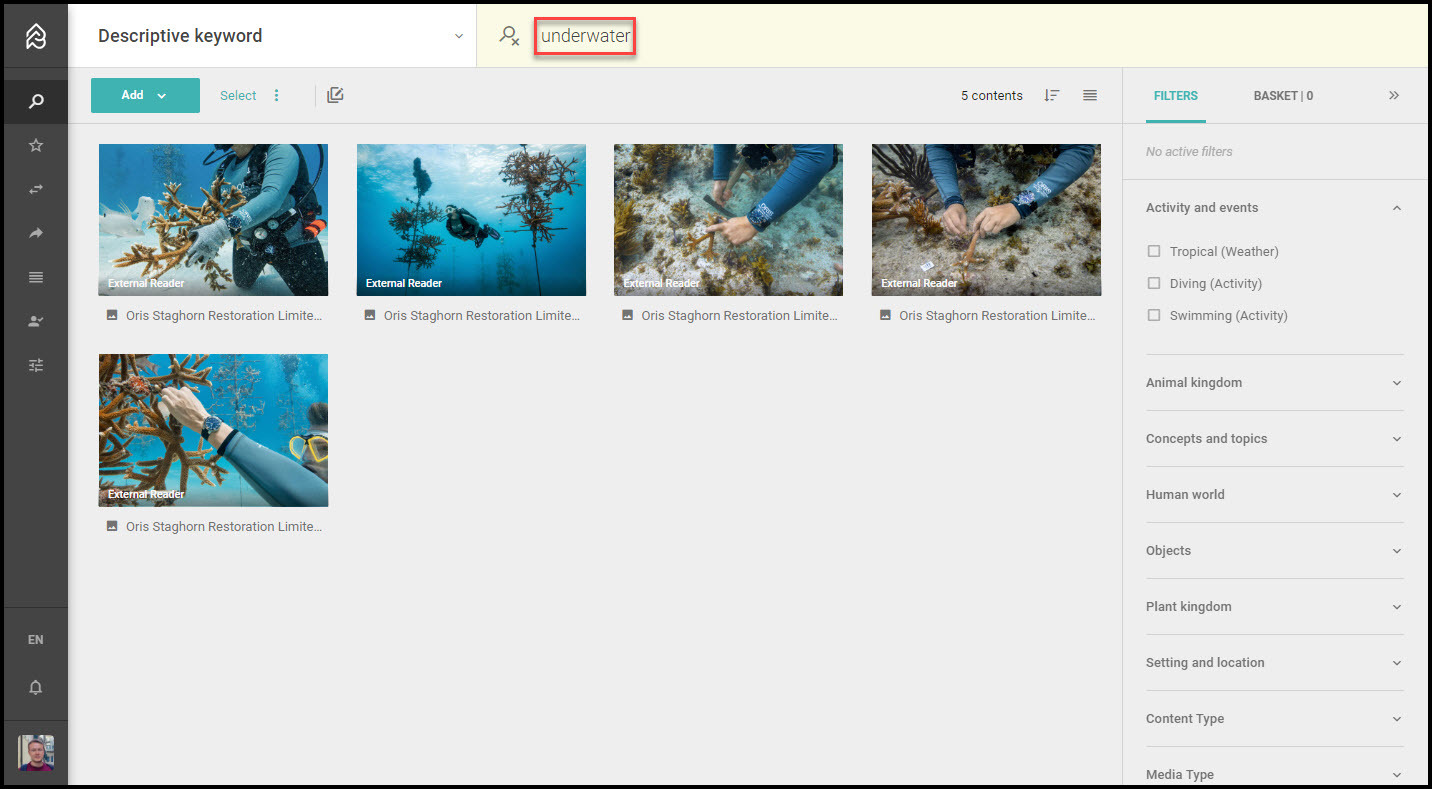
Using a DAM provider like Picturepark also means that you will have access to features that will make the whole process of taxonomy vocabulary building much easier; such as a native option to export a list of keywords based on your image collection. We’ll cover why this is important soon.
Method Two: Using an AI Web Demo
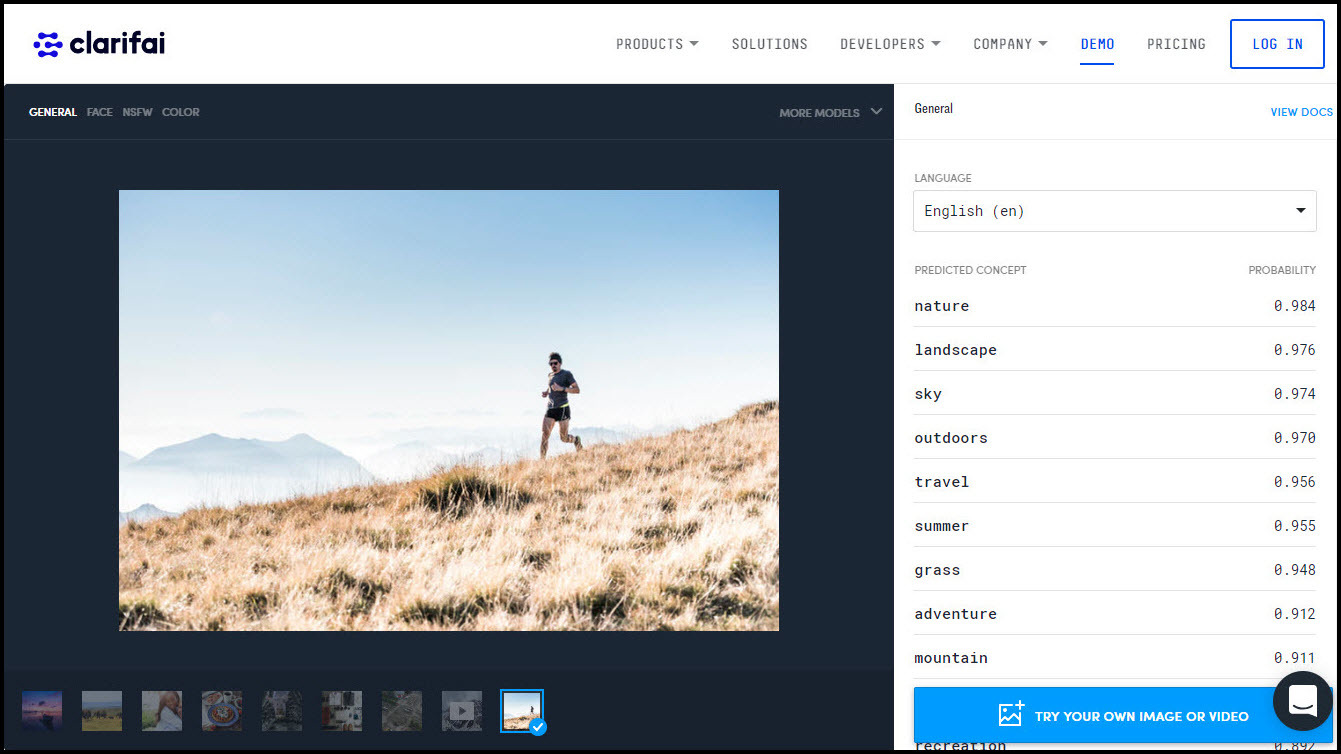
If you chose to go direct to an artificial intelligence provider with a browser-based trial, there are various options that you can consider. If you would like to use one of the providers we use frequently here at Picturepark, then head on over to the Clarifai demo page. However, there are also other free online demos to consider such as: Imagga and Microsoft Azure.
Using these tools might be the best option if you only have a small sample of images to use to build your taxonomy vocabulary, as these are just browser-based demo versions; they come with no option to export keywords en masse… so be prepared to copy and paste!
Method Three: Creating an API Client
If you opt to build your own API client, then you also have a range of different options in this area. If you would like to opt for this route then as well as Clarifai’s own API, you can also look at other artificial intelligence providers which give out free API keys for development purposes, they include: Google Vision, DeepAI, Amazon Rekognition and CloudSight. Be aware that, the free versions of the API keys are limited in various ways and full versions are paid, so be sure to check which works best for your purposes and read the small print from each provider before you set out on any development because privacy terms differ too.
Two Simple Steps to Create your AI Taxonomy
The process is simple, with only two steps:
1. Gather your Keywords: Harvest keywords through one of the three aforementioned methods.
2. Begin Text Analysis: Use a text analysis tool to prioritise and remove duplicates.
1. Gather your Keywords
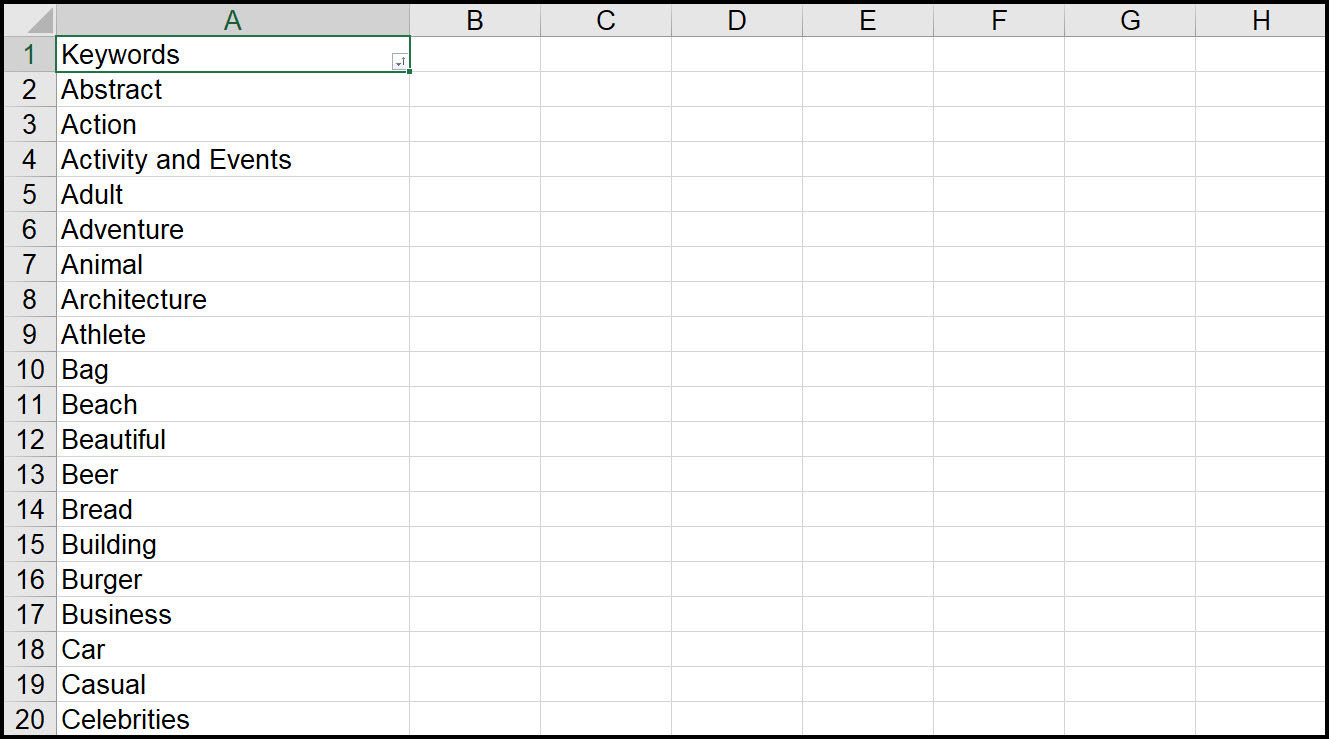
Once you’ve selected the method that works best for creating your taxonomy, you can then move on to starting to process and begin to harvest keywords, which will go on to form your taxonomy structure. Run all your images through your chosen image recognition provider and save the keywords that it generates for each. This can be done either via export, if using Picturepark or your own built API client, or if you are using a browser based demo version then this will need to be done through manual copying. You should then store this information in a spreadsheet as we need a structured list for step two.
Looking through your list of keywords, you’ll notice that there are some that may have been misidentified but as you will soon study the frequency of keywords found, this should filter them out. Additionally, there are likely to be many duplications listed too but don’t worry, as the next step in the process is to begin ‘digesting down’ the data you have captured.
2. Begin Text Analysis
To do the text analysis, we will be using a free tool called Textalyser, this tool will sort through your keywords and find out which are used most frequently. The concept here is to begin making a second list of terms, ideally on a new spreadsheet, that can directly be used for your taxonomy.
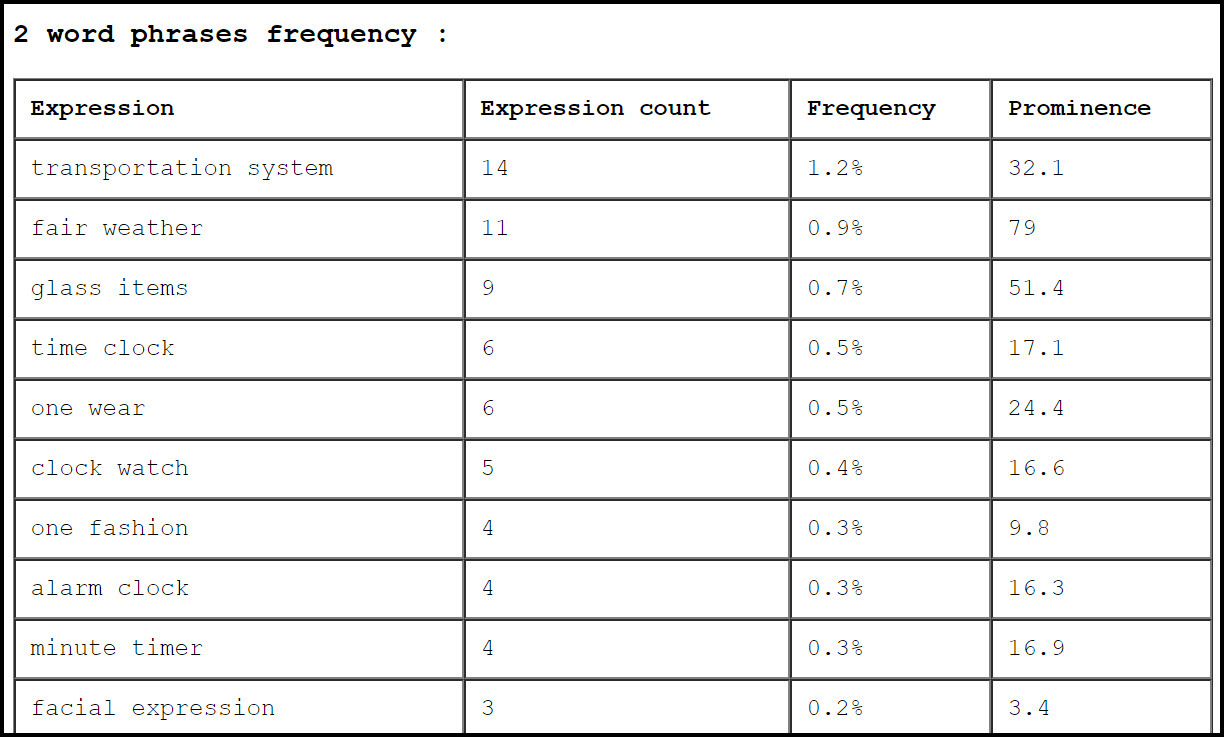
After you have copied your list of keywords into Textalyser, you will see a results page. On this page, the two areas you specifically need to pay attention to are: “Frequency and top words” and “2 word phrases frequency”. Before you copy the data from these areas into a new spreadsheet, it is important to first look through your results and study the frequency percentage. This simply shows, via percentage number, how frequently a phrase or word has been listed. You need to select the percentage number where your results are no longer relevant and use this as a cut off point where you stop copying. See the below screenshot for an example of the frequency percentage.
There is no correct specific percentage to use as a benchmark for the cut-off point and instead, it is best if you look through to where you deem your results are relevant and where they are irrelevant. Going down to a percentage too low will mean that you will include anomalies and ‘AI mis-fires’ in your taxonomy. Also keep in mind that you always can add back any omitted terms, so don’t go low just to see them included.
This step is more of an art, than a science, and it will be good to involve your internal test group at this point in the process, for a review. Some DAM, Content Management or Intranet software can export information from user search queries. Using this information, it becomes possible to directly compare and contrast your AI generated taxonomy against a ‘crowdsourced’ human test group. If you would like guidance in this area, a taxonomist professional could prove very helpful – see the end of the blog for more information.
Once you have copied this onto a new spreadsheet, you have created the backbone of your own basic taxonomy. This can now be used for a variety of purposes – everything from improving it by adding a hierarchy or synonyms (for which our sample taxonomy download could prove interesting), noting down interesting observations about your content or even creating your own instance on a content management system.
A Fresh View on Taxonomies
Taxonomies can often be an area of worry; one that can intimidate new users when starting out in content management. What we set out to do with this blog post, is to prove that creating a basic taxonomy doesn’t have to involve a great deal of work, patience or even foresight. A taxonomy is not static: instead it grows and adapts over time as content changes.
Image recognition need not only be used only for a commonly used purposes. In this case, we reverse engineered the use of artificial intelligence to create a purpose-built taxonomy using a sample collection of images. Once created, this has the potential to provide a framework for manual additions or giving to a taxonomist to improve.
If you would like to get in touch with a taxonomist, find out more about the subject area or learn about DAMs in general – head on over to DAM Guru Program.
