By Picturepark Communication Team • Apr 29, 2014
Batch-editing metadata in a digital asset management system can save time and help ensure metadata consistency. The Picturepark Batch Editor enables you to perform detailed batch editing sessions in which you have more control than you might expect. You can preview all changes before your records are updated, and you can even fine-tune the values assigned to each asset.
Choosing the Assets You Need
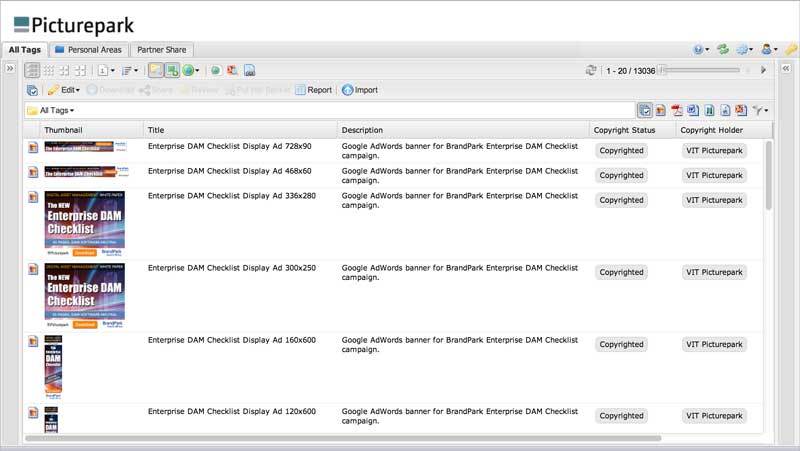
You can use any search option in Picturepark to find the digital assets you want to work on. Menu options are available to batch-edit all records found from your most recent search, or just those you’ve selected.
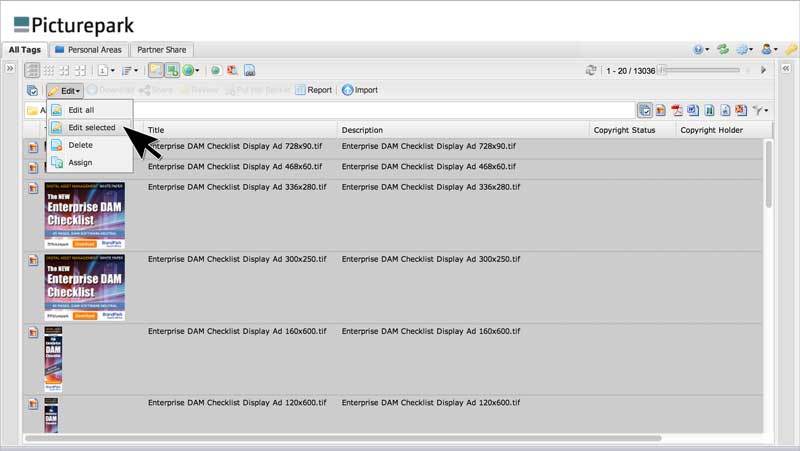
The selected assets in this image have the same information in their Title and Description fields, and they’re missing copyright information too. We’ll fix that and provide some additional values too.
Choosing Metadata Fields for Editing
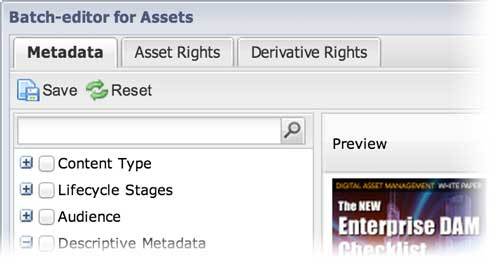
DAM systems can have hundreds of metadata fields, so when performing batch edits, it’s important that you can easily work with only those fields you need, without risking unintended changes in other fields.
The Picturepark Batch Editor includes a tree that shows all metadata fields used in one or more of the selected assets. This is important because Picturepark Adaptive Metadata means that metadata schemas can differ between assets. For example, a metadata field that’s used in one asset might not be used in another. All you need to remember about the Picturepark Batch Editor is that it will always show only those fields that make sense for the current batch of digital assets. Metadata fields that are not assigned to any of the selected assets will not appear in the tree.
We’ll start this editing session by adjusting the values in the English-language Title and Description fields. Using the tree, we navigate to find and select those fields. Selected metadata fields appear in the editing area as columns. (A horizontal scroll bar appears if you’ve selected more fields than can fit in the visible portion of the window.)
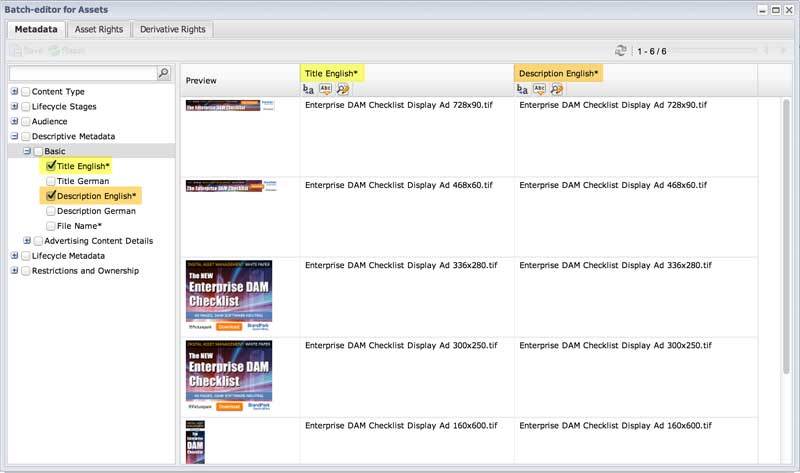
By choosing only those fields you want to edit, you simplify the editing interface and you reduce the risk of making unintended changes. The tree on the left provides access to all metadata fields assigned to the assets in the batch.
Editing Options
At the top of each text field column, there are three icons to represent the editing options available:
- Replace – This option simply replaces all current values with a new value.
- Insert – This option enables you to insert new text into the position you specify, counting either from the left or right.
- Search & Replace – This option finds all occurrences of a given string of text and replaces those occurrences with the value you provide. Case can be considered, if needed.
String field editing icons: Replace, Insert and Search/Replace.
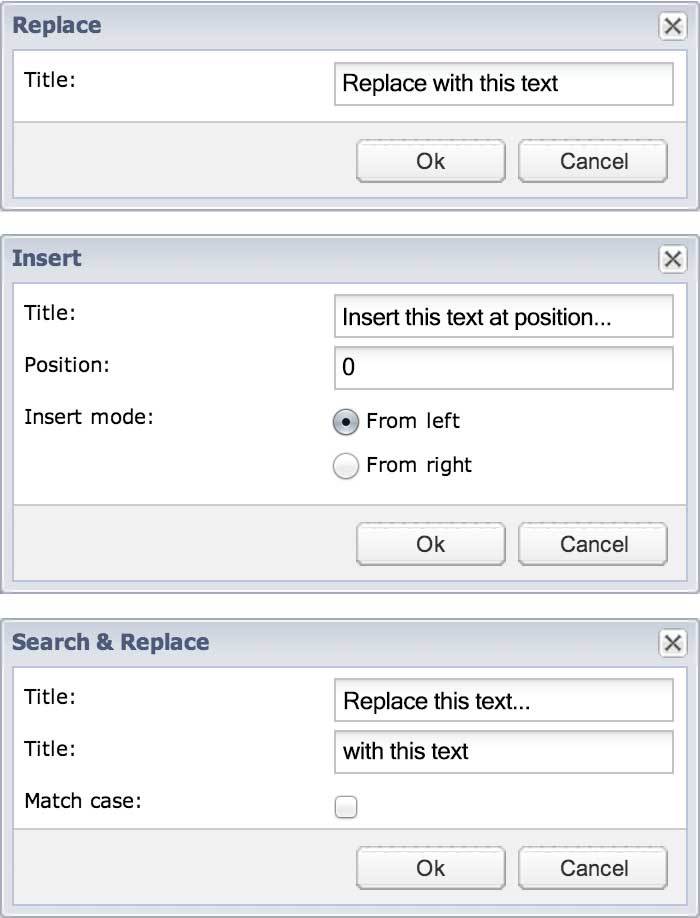
The three editing options available for text fields enable you to perform detailed changes.
Editing Free-form Text Metadata Values
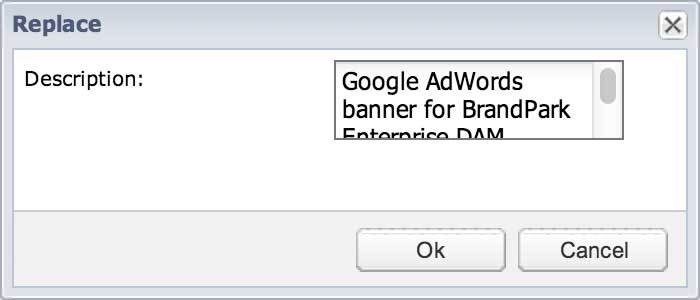
To start our editing session, we’ll remove the .tif from the Title column and we’ll change entirely what’s in the Description field.
The image below shows an example of how the file extension “.tif” can be removed and then added back. By leaving empty the lower field in the Search & Replace window, you effectively delete the string provided in the upper field.
If you ever want to add a file extension (or any other value), you use the Insert mode and choose where in the metadata field you want the string to appear. By inserting “.tif” at position 0 from the right of the current value, we add it to the end of the current value. (It might be more natural for you to think in terms of “from the start” and “from the end” rather than from “from left” or “from right”.)
Being able to change and insert values with such precision is important for workflows that depend on file names, or use codes in other metadata fields.
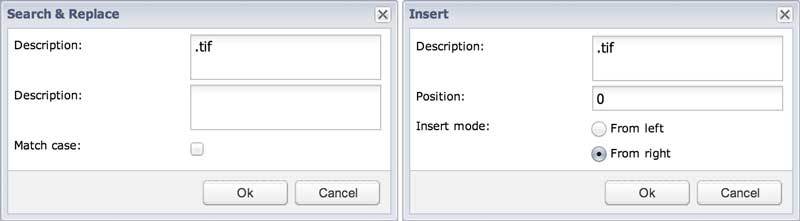
By chaining different editing modes together, you can perform virtually any edits you need. This example removes “.tif” and then adds it back.
To change the value in the Description field, we click the Replace button above that field column and type or paste our new value. When we click OK, all values will be updated.
At any time during your edit session, you can choose to save your changes or reset the Batch Editor to its initial state. If you choose reset, all edits you’ve made will be removed without affecting the underlying records. This gives you a handy means for testing batch-edit changes before irreversible updates are made.
Save writes your edits to the asset records. Reset returns the Batch Editor to its original state, without affecting the underlying records.
Editing Structured Metadata Values
When adding values from fields that use structured content, type-ahead and checkbox selections are available to make data entry fast, easy and more accurate.
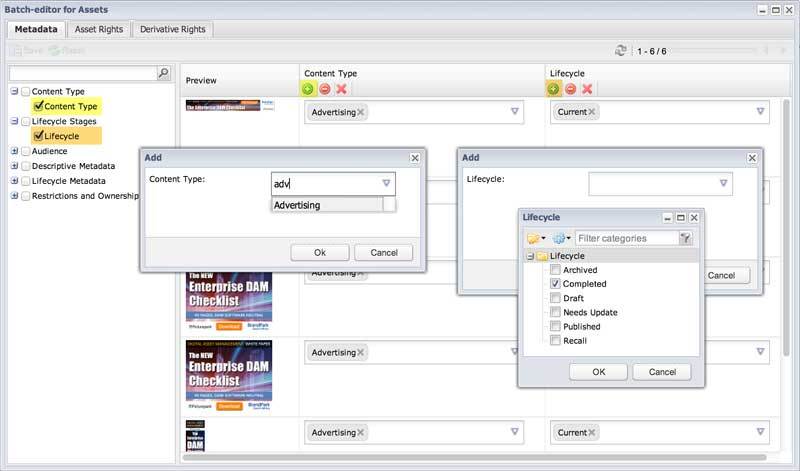
When adding new classes to the assets, any new metadata fields provided by those classes become available to you. This image shows the two windows that appear when adding classes to Content Type and Lifecycle.
If you use the Batch Editor to add or remove classes from assets, the tree of fields is updated to reflect the metadata schema changes when you click the Save button. For example, if you add the Advertising class, as shown above, the fields provided by that class become available once you click the Save button. (See below.)
With the Completed Lifecycle class added to the assets in the image above, two new metadata fields become available in the tree: Approved By, which refers to a controlled vocabulary, and Archive By, which is a Date field. Fields that are available within the Editor (because they are used by some assets) will appear disabled when displayed for assets to which the fields have not yet been assigned.

After the Completed class is assigned, fields provided by that class become available in the Batch Editor.
The Advertising class assigned to these assets also provided some new metadata fields. Those can also be edited during the same session.
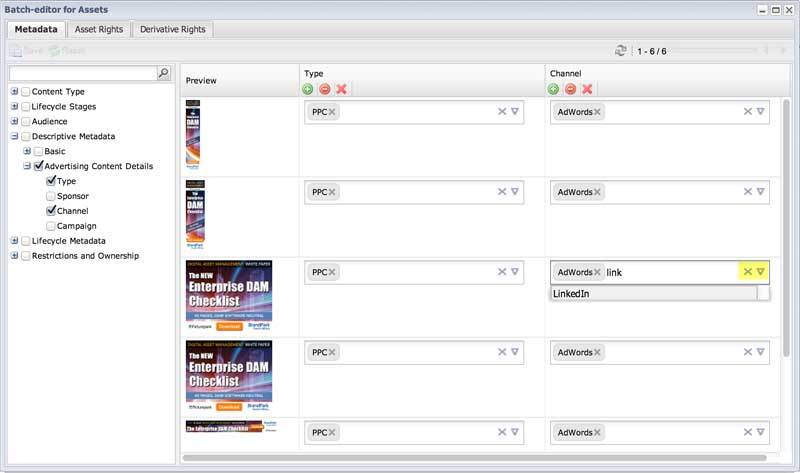
Though the Advertising class provided four new fields, only two have been selected for editing. Both are based on controlled vocabularies, so type-ahead helps make data entry fast and accurate. The down arrows lead to windows that show the entire vocabulary as selectable checkboxes.
Saving Your Edits
With all these edits complete, you can click Save to write the changes to the asset records.
The changes from the batch-editing session are shown.
If you ever need to abandon the changes you’ve made in the Batch Editor, click the Reset button.
Enforcing Metadata Consistency
Sometimes, assets that should have the same metadata values don’t. This can happen when users make edits to some assets, leaving others for a “later” session that never comes. You can also find metadata inconsistencies in free-form text fields when User A uses one structure for a caption and User B uses another.
In either case, the Picturepark Batch Editor makes it easy for you to make granular edits to ensure consistency across your collection. When you open the Batch Editor, you’ll immediately see which assets are missing values or have different values. You can copy values from one asset into another, or you can just use existing values as reference for the changes you need to make to other assets.
Being able to copy and edit values from other assets is important because you won’t always work with structured metadata. For example, you might have a controlled vocabulary that includes your own copyright notice but it’s not likely you’ll have a vocabulary entry for the notices of all your customers or suppliers. Still, you want to make sure those values are all the same throughout your system.
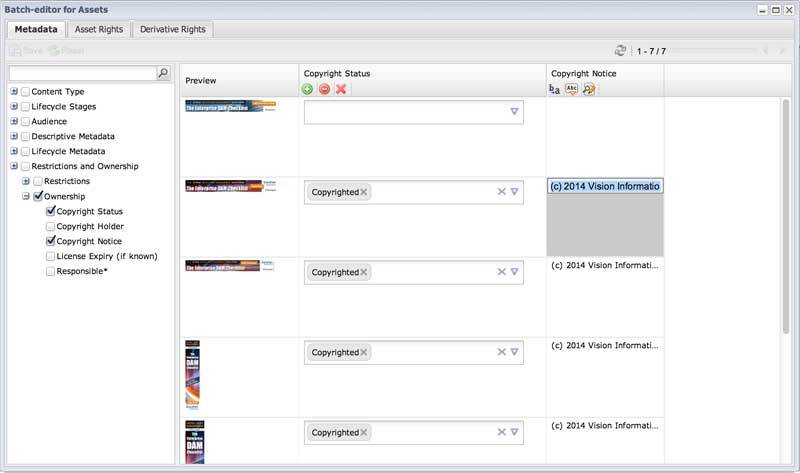
The banner at the top of the window lacks a copyright notice and status. It’s easy to copy the copyright from another asset, click into the empty field and paste the value.
Easier Metadata Localizations
Just as the Batch Editor can be used to fix metadata inconsistencies between assets, it can also be used as a translation or localization editor. Just select the assets that need localized values, and display the language fields in the Batch Editor. It’s easy for the localizer to see the native language content and, equally important, he or she can see the context in which the value is used. For example, is it a description or caption that should adhere to a certain format or style? Without context, localizations can be less than ideal.
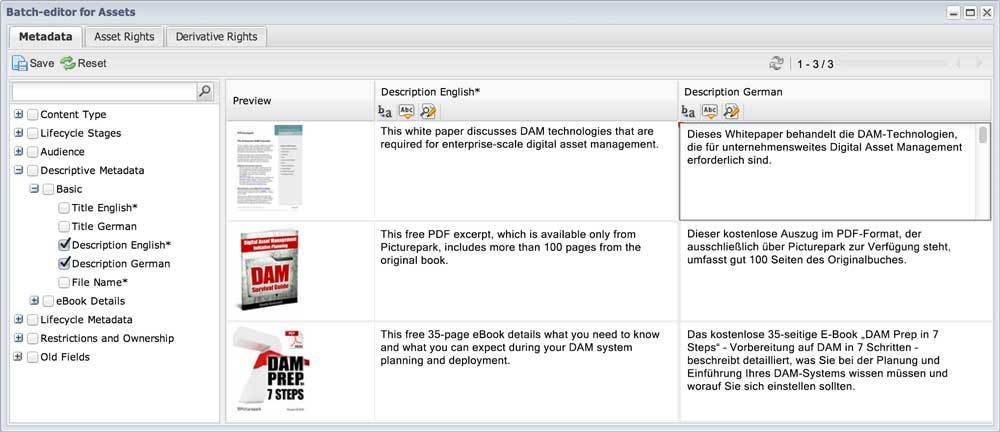
Side-by-side multi-language metadata fields makes in-line localization much easier, and helps improve localization consistency and quality.