|
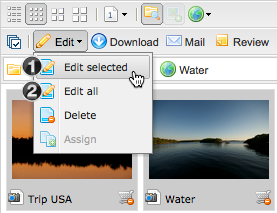
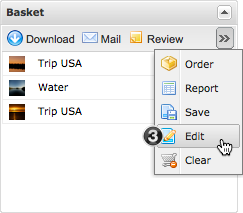
To edit multiple assets at once you can select the assets you would like to edit and click on the edit button (1). You can also optionally edit all the assets displayed by clicking on Edit selected (2). Editing in the basket is also possible, through which asset from different categories can be edited easily (3).
 Tip Tip
The synchronization of the XMP Metadata will take some time to complete when batch editing multiple large files. If the synchronization has not yet been completed or an asset and its derivatives then an icon appears as shown below.

|
The window that opens is divided into different areas in which different asset information can be edited. Important tip: to save changes you need to click on the save button in each area.
 Metadata Metadata
In the left part of the window a list of available metadata fields which can be edited is shown. A field is added to the list on the right hand side by activating a checkbox in front of the metadata field name.
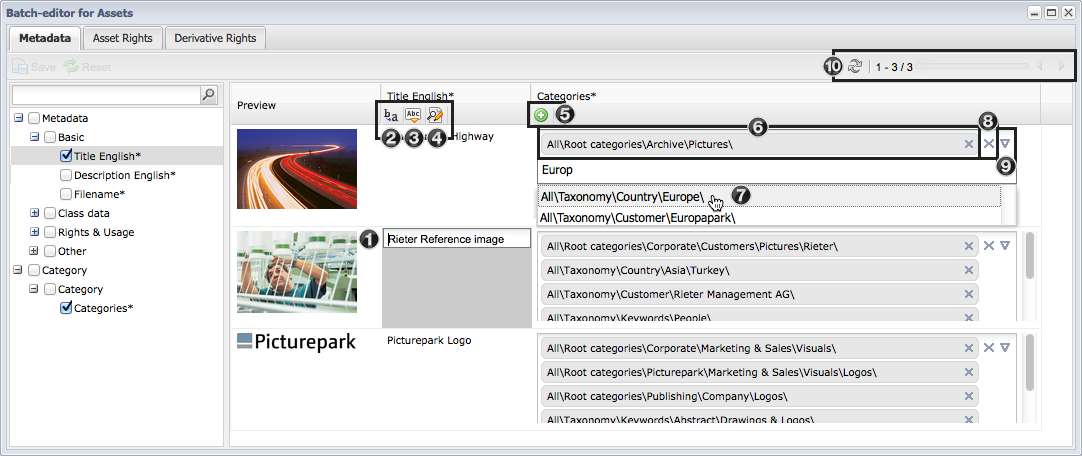
The metadata can now be edited using different functions:
- Manual entry of the entries per asset and metadata field by clicking on the current entry
- Replacing all entries for all assets for a metadata field.
- Insertion of additional content for all assets in a metadata field at a specific position.
- Search and replace of entries for all assets for a metadata field.
- Addition of category assignments for all assets.
- Already assigned assets are shown as a box and can be removed by clicking the "X" next to the category path.
- After entering at least 3 characters in the metadata field suggestions for entries with these character strings are displayed. The desired category can now simply be selected out of the search results to add it to the list.
- The category assignments can be removed using the "X" on the right border of the field.
- By clicking on the arrow the window for the selection of more than one category at a time is opened.
- Assets can be edited in groups of 500. By using the arrow above the asset list you can change to the next 500 assets.
|
 Asset Rights Asset Rights
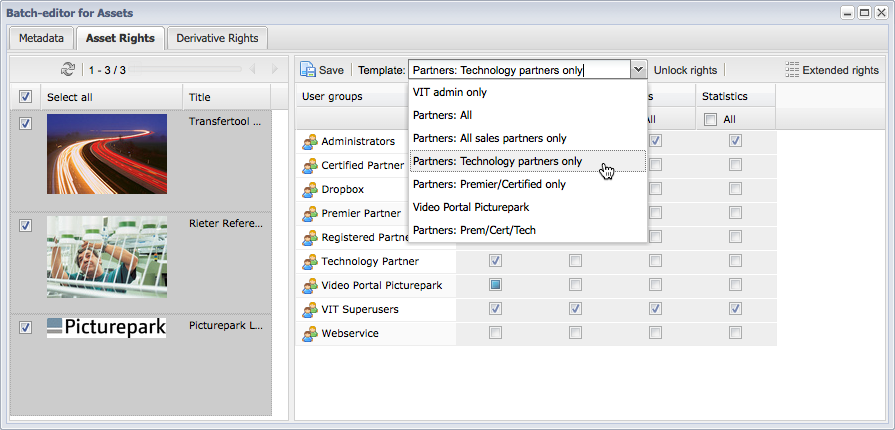
On the left hand side the assets for which the asset rights should be changed can be selected using the checbox in front of each asset. To select all the assets you can activate the Select all checkbox up the top. The rights templates can be adjusted on the right hand side.
 Tip Tip
Depending on the rights of the logged in user the rights templates can be adjusted over the alter rights button. This function should however be avoided as a rule for the sake of clarity.
|
|
 Derivative Rights Derivative Rights
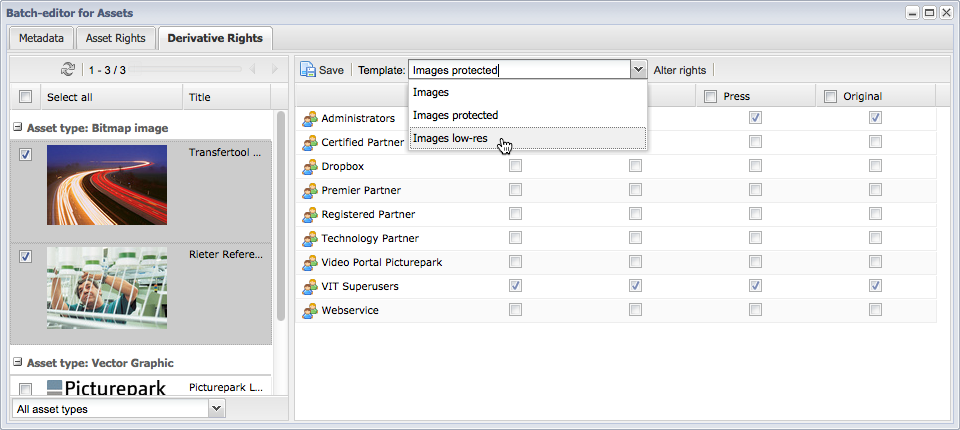
The assets for which the derivative rights should be changed can be selected on the left hand side using the checkbox in front of each asset. To select all assets you can activate the checkbox next to "Select all". The rights templates can be adjusted on the right hand side.
In the derivative
 Tip Tip
Depending on the rights of the logged in user the rights templates can be adjusted over the alter rights button. This function should however be avoided as a rule for the sake of clarity.
|
|
| 


